
How to Anneal Brass Casings with the Ugly Annealer
Step-by-step instructions and tips for perfect annealing every time.
Welcome to our step-by-step guide on using the Ugly Annealer, a premium tool designed to extend the life of your brass casings and ensure accurate reloading. Follow these steps for a seamless annealing process.
Step 1: Preparation
Before starting the annealing process, ensure you have everything ready:
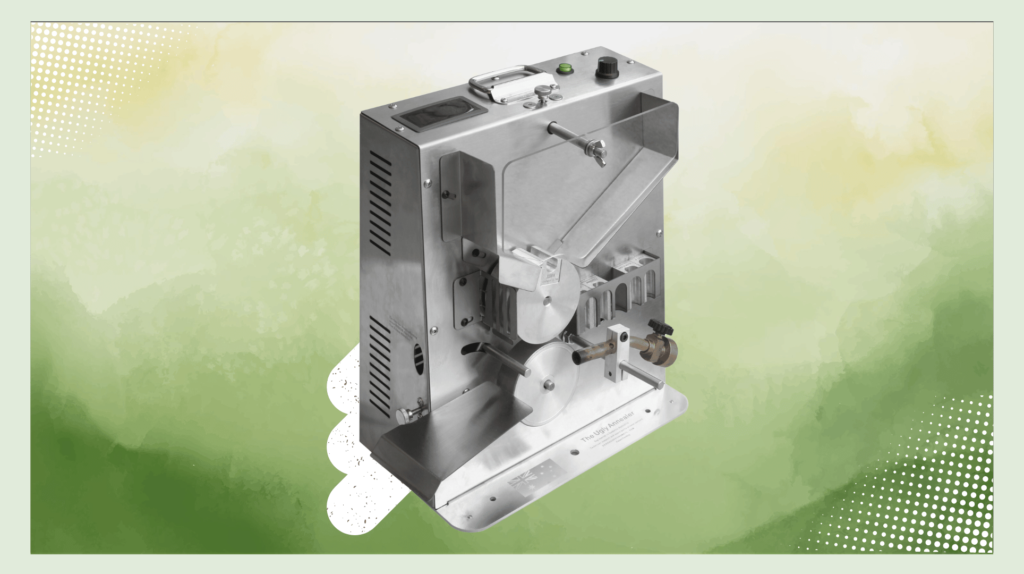
- Ugly Annealer Machine – Your essential tool for annealing brass.
- Brass Casings – Ensure your brass is clean and ready for annealing.
- Safety Gear – Wear safety glasses and heat-resistant gloves to protect yourself during the process.
Step 2: Set Up the Ugly Annealer
Setting up the Ugly Annealer is quick and simple. Follow these steps:
- Position the Machine: Place your Ugly Annealer on a stable, heat-resistant surface to ensure safety during use.
- Power Connection: Plug the machine into a suitable power source. Make sure all connections are secure.
- Adjust Temperature: Use the temperature settings according to the brass type you’re annealing. Refer to the Ugly Annealer user manual for detailed temperature guidelines based on your brass.
Step 3: Annealing Process
Now that the Ugly Annealer is set up, it’s time to anneal your brass casings. Follow these steps:
- Inspect Brass Casings: Carefully check the brass casings for any defects such as cracks or excessive wear. Discard any casings that show significant damage.
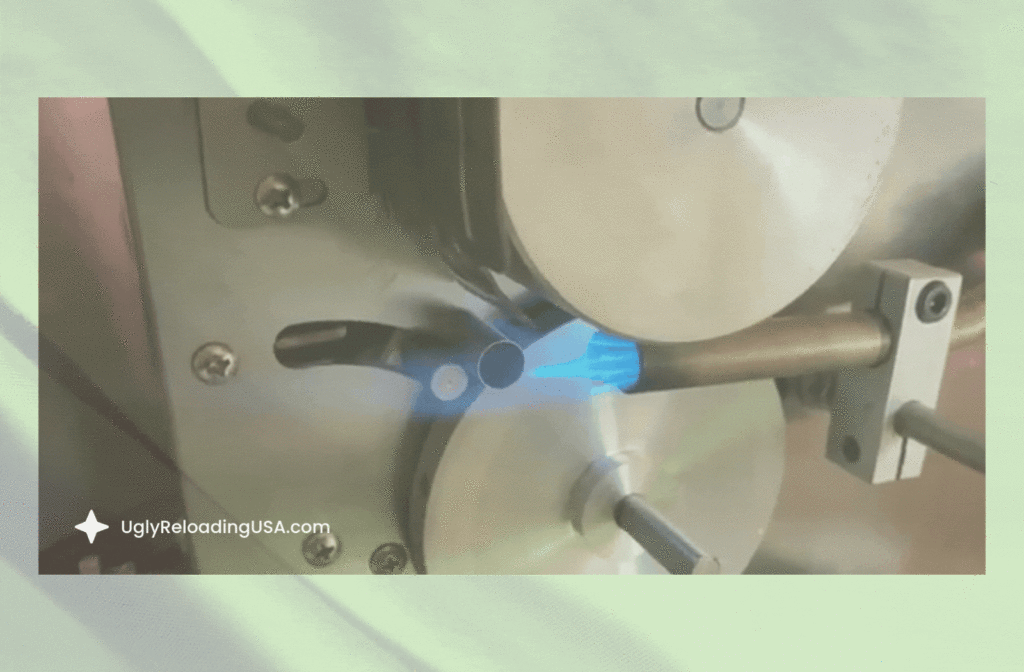
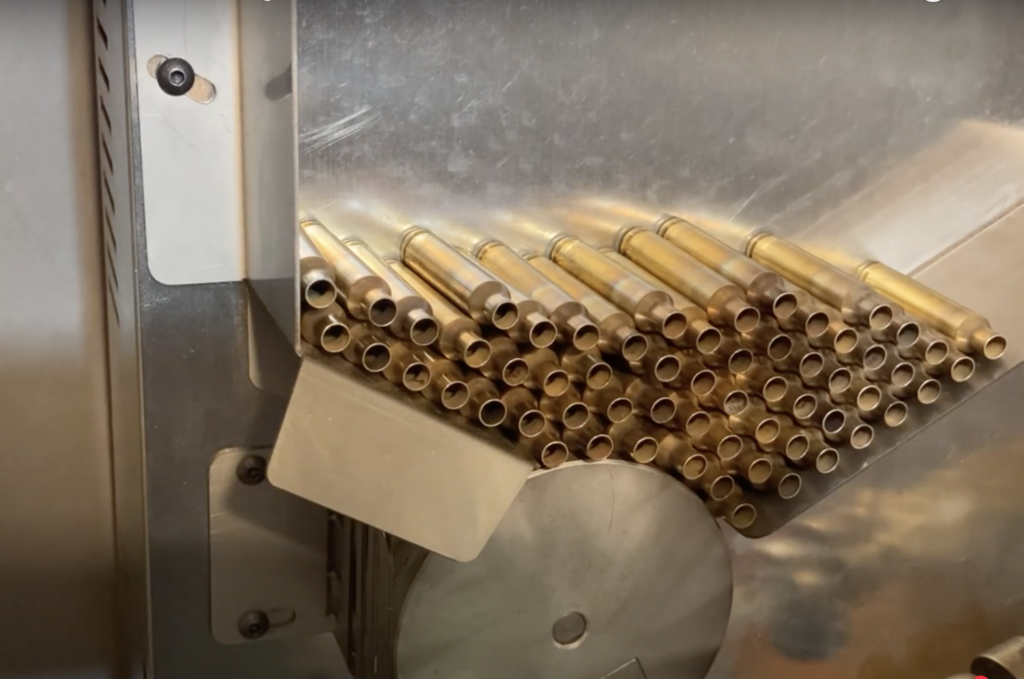
- Load the Brass: Place the brass casings into the Ugly Annealer, ensuring they’re positioned securely to prevent any movement during annealing.
- Activate the Annealer: Start the Ugly Annealer. The machine will heat the brass to the desired temperature, softening the metal to relieve internal stresses.
- Monitor the Process: Keep a close eye on the annealing process to prevent overheating or underheating.
- Follow the recommended annealing time in the Ugly Annealer’s user manual for consistent results.
- Cool the Brass: Once annealing is complete, allow the brass casings to cool completely before handling them. This ensures safe and effective processing.
Step 4: Inspection and Storage
Once your brass casings are annealed, it’s time for inspection and storage:
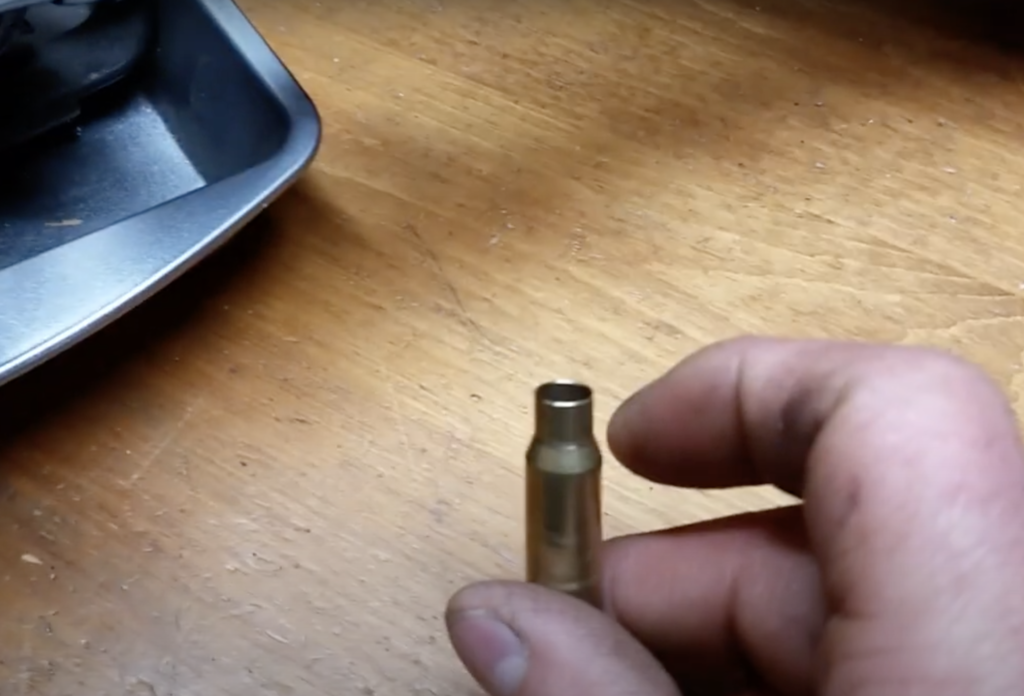
- Inspect for Consistency: After annealing, inspect your brass casings for signs of overheating or any defects. Look for uniform coloration along the brass. Properly annealed brass should have a smooth, consistent color.
- Store the Brass: After inspection, store the annealed brass in a clean, dry, and secure container to protect it from contaminants. Proper storage helps maintain the quality of your brass and ensures it’s ready for the next reloading process.
Why Anneal Brass Casings?
Annealing your brass is a critical step in reloading that helps extend the lifespan of your brass and ensures your reloads are consistent and precise. By softening the brass, annealing helps to relieve internal stresses and prevent cracking during reloading. With the Ugly Annealer, you can achieve professional-level results every time.
Ready to Start Annealing?
Get your Ugly Annealer and start annealing like a pro today! Shop now and take your reloading process to the next level.